El anfitrion de reto de este mes de Enero 2010 de las Daring Bakers' es Luren de Celiac Teen. Lauren elegió las Galletas Graham Libre de Gluten y las Barras Nanaimo. Las fuentes que ella ha usado son del libro de recetas 101 Cookbooks y www.nanaimo.ca.
The January 2010 Daring Bakers' challenge was hosted by Lauren of Celiac Teen. Lauren chose Gluten-Free Graham Wafers and Nanaimo Bars as the challenge for the month. The sources she based her recipe on are 101 Cookbooks and www.nanaimo.ca.
The January 2010 Daring Bakers' challenge was hosted by Lauren of Celiac Teen. Lauren chose Gluten-Free Graham Wafers and Nanaimo Bars as the challenge for the month. The sources she based her recipe on are 101 Cookbooks and www.nanaimo.ca.
****
Este reto me ha resultado de lo más facilito, no se necesita horno y las capas se hacen bastante rápido. Eso sí, lo más laborioso fueron las GALLETAS GRAHAM, pero si no quieres hacerlas, las compras ya hechas y listo jejeje...
Queda un postre delicioso, nos ha gustado mucho!! La única pega que lleva demasiada mantequilla en las 3 capas, tanta que no me bastaba con la que tenía en casa y tuve que salir disparada a comprar más jejeje..Para mi gusto la próxima ves la capa del centro la hago más pequeña, empalagaba un poco, pero de sabor estaba muy buena.
HICE LA RECETA CON HARINA DE TRIGO, aunque he mantenido la receta original del reto para todas aquellas personas celiacas que quieran hacerlas solo tiene que hacerlos con las harinas apropiadas y quitar la harina de trigo.
****
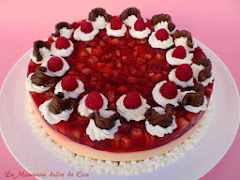
Las Barras Nanaimo son un postre clásico de Canadá creado por sino otro que Nanaimo, British Colombia. Por si acaso te estas preguntando, se pronuncia Nah-nye-Moh. Estas barras tienen 3 capas: una base que contiene galletas graham machacadas, cacao, coco y frutos secos, una capa media de natillas, y una cobertura de chocolate. Estan extremadamente buenas y disponibles en casi cualquier sitio a través del país.
Nanaimo Bars are a classic Canadian dessert created in none other than Nanaimo, British Colombia. In case you were wondereing, it's pronounced Nah-nye-Moh. These bars have 3 layers: a base containing graham crackers, cocoa, coconut and nuts, a middle custard layer, and a topping of chocolate. They are extremely rich and available almost everywhere across the country.
NOTAS de Luren PARA LAS GALLETAS GRAHAM SIN GLUTEN Y BARRAS NANAIMO:
* La harina de arroz "glutinous" no contiene nada de gluten, ya que esta hecha con un tipo de arroz llamado glotinous (ó dulce) arroz.
* La masa de galletas Graham es muy pegajosa. Asegúrate de enharinarla bien (con harina de arroz dulce), ó sera muy díficil retirar la masa de la superficie de trabajo al extenderla. También asegúrate de mantenerla fría. Para que no se derrita la mantequilla.
* Ella ha elegido estos tipos de harina por su disponibilidad. Tapioca almidón/harina y harina de arroz dulce se suelen encontrar en tiendas Asiáticas, ó en la sección de Asia de tu supermercado. El sorgo puede ser más díficil de encontrar, pero puede ser sustituido por harina de arroz integral, harina de mijo ó otras alternativas.
* En las Barras Nanaimo, es muy importante que el chocolate este frio pero aun líquido, de lo contrario la capa de natillas se derritirá, y se mezclará con el chocolate, siendo díficil extenderla. Deja el chocolate a temperatura ambiente pero que no solidifique antes de expandirlo sobre la capa de arriba.
NOTES of Luren FOR GLUTEN-FREE GRAHAM WAFERS AND NANAIMO BARS:
* Glutinous rice flour does not contain any gluten, as it is made from a type of rice called glotinous (or sweet) rice.
* The Graham wafer dough is very sticky. Make sure you are flouring (with sweet rice flour) well, or the dough will be difficult to remove from the surface you roll it out on. Also be sure to keep it cold. You do not want the butter to melt.
* She chose these flours because of their availability. Tapioca starch/flour and sweet rice flour can often be found in Asian grocery stores, or in the Asian section of you grocery store. Sorghum can be slightly more difficult to find, but it can be replaced with brown rice flour, millet flour or other alternatives.
*In the Nanaimo Bars, it is very important that the chocolate be cool but still a liquid, otherwise the custard layer will melt, and it will mix with the chocolate, being difficult to spread. Allow the chocolate mixture to come to room temperature but not solidify before spreading the top layer on.
VARIACIONES PERMITIDAS:
* Aunque ella recomienda usar harinas sin gluten, ya que química es muy interesante y el resultado final puede ser increíble, podemos usar harina de trigo.
* Si hacemos las galletas sin gluten, no harina de trigo, cebada, centeno trigo+centeno, kamut, espelta, trigo candeal, ó otros tipos de ingredientes que contengan gluten pueden ser usados. Mezclando esos ingredientes asegurate que ella esta libre de ellas para enfermedades celiacos y otras cuestions de salud donde el gluten causa problemas. Si tienes la intención de servirlas a alguien que tenga una dieta libre de gluten, asegurate de no ocurra ninguna contaminación.
VARIATIONS ALLOWED:
* Although She highly recommend using gluten-free flours, as the chemestry is very interesting and the end result can be amazing, you are allowed to use wheat.
* If making them gluten-free, no wheat, barley, rye, triticale, kamut, spelt, durum, semolina, or other gluten containing ingredients may be used. Removing those ingredients ensures it is safe for those with Celiac Disease and other health issues where gluten causes probles. If you do plan on serving this to someone on a gluten-free diet, also ensure no cross-contamination occurs.
TIEMPO DE PREPARACIÓN:
* Galletas Graham: un total de 30 a 45 minutos de tiempo activo, 2 1/2 horas a toda la noche y 45 minutos de tiempo inactivo.
PREPARATION TIME: * Graham Wafers: 30 to 45 minutes total active prep, 2 1/2 hours to overnight and 45 minutes inactive prep. * Nanaimo Bars: 30 minutoes.
* Galletas Graham: un total de 30 a 45 minutos de tiempo activo, 2 1/2 horas a toda la noche y 45 minutos de tiempo inactivo.
PREPARATION TIME: * Graham Wafers: 30 to 45 minutes total active prep, 2 1/2 hours to overnight and 45 minutes inactive prep. * Nanaimo Bars: 30 minutoes.
EQUIPAMIENTO REQUERIDO:
* Robot de cocina
* Boles
* Papel de hornear ó de silicona
* Corta pastas
* Doble bol ó olla para el baño maría
* 20,32 x 20,32 cm bandeja cuadrada
* Batidora de mano ó eléctrica (Puedes usar una cuchara de madera, pero esto lo hará más facil!)
* Cacerola
* Robot de cocina
* Boles
* Papel de hornear ó de silicona
* Corta pastas
* Doble bol ó olla para el baño maría
* 20,32 x 20,32 cm bandeja cuadrada
* Batidora de mano ó eléctrica (Puedes usar una cuchara de madera, pero esto lo hará más facil!)
* Cacerola
EQUIMENT REQUIRED:
* Food Processor
* Bowls
* Parchment paper or silpats
* Cookie sheets
* Double boiler or pot and heatproof bowl
* 8 by 8 inch square pan
* Hand mixer or stand mixer ( You may use a wooden spoon, but this makes it much easier!)
* Saucepan
* Food Processor
* Bowls
* Parchment paper or silpats
* Cookie sheets
* Double boiler or pot and heatproof bowl
* 8 by 8 inch square pan
* Hand mixer or stand mixer ( You may use a wooden spoon, but this makes it much easier!)
* Saucepan
INGREDIENTES GALLETAS GRAHM ( con ó sin gluten)
Yo sustituí esas tres harinas por 270 gr. de harina de trigo.
* 1 taza (138 gr.) (4.9 onzas) Harina dulce de arroz (también conocida como Harina de arroz glutinous)
* 3/4 taza (100 gr.) (3.5 onzas) Almidón/Harina de Tapioca
* 1/2 tazas (65 gr.) (2.3 onzas) Harina de sorgo
* 1 taza (200 gr.) (7.1 onzas) Azúcar moreno
* 1 cucharadita (5 mL) Bicarbonato de soda
* 3/4 cucharadita (4mL) Sal gorda
* 7 cucharadas (100 gr.) (3 1/2 onzas) Mantequilla sin sal (Cortada en cubitos de 1 pulgada y fría)
* 1/3 taza (80 mL) miel (sabor suave como la de trébol u otra) [NOTAeva: use miel de abejas]
* 5 cucharadas (75 mL) Leche entera [NOTAeva: use leche semidesnatada]
* 2 cucharadas (30 mL) Extracto de vainilla pura [NOTAeva: use vainillla líquida]
FOR GLUTEN-FREE GRAHM WAFERS INGREDIENTES
1 cup (138 g.) (4.9 ounces) Sweet rice flour (also known as glutionous rice flour)
3/4 cup (100 g.) (3.5 ounces) Tapioca Starch/Flour
1/2 cup (65 g.) (2.3 ounces) Sorghum Flour
1 cup (200 g.) (7.1 ounces) Dark Brown Sugar, Lightly packed
1 teaspoon (5 mL) Baking soda
3/4 teaspoon (4mL) Kosher Salt
7 tablespoon (100 g.) (3 1/2 ounces) Unsalted Butter ( Cut into 1-inch cubes and frozen)
1/3 cup (80 mL) Honey, Mild-flavoured such as clover
5 tablespoon (75 mL) Whole Milk
2 tablespoon (30 mL) Pure Vanilla Extra

DIRECTIONS:
1. En el bol de la batidora fijar la hoja de acero, mezcla las harinas, el azúcar moreno, el bicarbonato de soda, y la sal. Pulsa baja velocidad para integrarlas. Añade la mantequilla y pulsa on y off, hasta que la mezcla adquiera consistencia basta. Si se hace a mano, combina los ingredientes secos mencionados con una barrilla, luego corta la mantequilla y agregarla hasta adquirir una masa basta. Los pedazos de mantequilla no deben ser visibles.
1. In the bowl of a food processor fitted with a steel blade, combine the flours, brown sugar, baking soda, and salt. Pulse on low to incorporate. Add the butter and pulse on and off, until the mixture is the consistency of a coarse meal. If making by hand, combine aforementioned dry ingredients with a whisk, then cut in butter until you have a coarse meal. No chunks of butter should be visible.
1. In the bowl of a food processor fitted with a steel blade, combine the flours, brown sugar, baking soda, and salt. Pulse on low to incorporate. Add the butter and pulse on and off, until the mixture is the consistency of a coarse meal. If making by hand, combine aforementioned dry ingredients with a whisk, then cut in butter until you have a coarse meal. No chunks of butter should be visible.


2. En un bol pequeño ó una taza de medir, bate juntos la miel, la leche y la vainilla. Añádelo a la mezcla de harina hasta que este todo integrado. Quedará una masa muy suave y pegajosa.
2. In a small bowl or liquid measuring cup, whisk together the honey, milk and vanilla. Add to the flour mixture until the dough barely comes together. It will be very soft and sticky.
2. In a small bowl or liquid measuring cup, whisk together the honey, milk and vanilla. Add to the flour mixture until the dough barely comes together. It will be very soft and sticky.


3. Vuelca la masa sobre una superficie bien enharinada (si la haces sin gluten con harina sin gluten) y forma una bola (ó cuadrado) con la masa. Envuélvela en papel de plástico y enfriarla en la nevera hasta que este firme, alrededor de 2 horas, ó toda la noche.
3. Turn the dough onto a surface well-floured with sweet rice flour and pat the dough into a rectangle about 1 inch thick. Wrap in plastic and chill until firm, about 2 hours, or overnight.
3. Turn the dough onto a surface well-floured with sweet rice flour and pat the dough into a rectangle about 1 inch thick. Wrap in plastic and chill until firm, about 2 hours, or overnight.


4. Divide la masa por la mitad y vuelve a meter la otra mitad en la nevera (para que la mantequilla no se derrita). Enharinar la superficie de trabajo y extiende la masa en un rectangulo largo, alrededor de 1/8 pulgadas de grosor. La masa quedará bastante pegajosa, por eso enharina lo que necesites. Cortar cuadrados de 4 x 4 pulgadas. Juntas los pedazos de masa y reservar para cortar más cuadrados. Coloca las galletas en una ó dos bandejas de horno con papel de hornear. Meter en la nevera para que se enfrien, al rededor de 30 a 45 minutos [NOTAeva: yo solo lo tuve 10 minutos]. Repite la operación con la otra mitad de la masa.
4. Divide the dough in half and return one half to the refrigerator. Sift an even layer of sweet rice flour onto the work surface and roll the dough into a long rectangle, about 1/8 inch thick. The dough will be quite sticky, so flour as necessary. Cut into 4 by 4 inch square. Gather the scraps together and set aside. Place wafers on one or two parchment-lined baking sheets. Chill until firm, about 30 to 45 minutoes. Repeat with the second batch of dough.


5. Ajusta la bandeja en la parte de arriba del horno y precalienta el horno a 180 grados.
5. Adjust the rack to the upper and lower positions and preheat oven to 350 degrees Fahrenheit (180 degrees Celsius).
5. Adjust the rack to the upper and lower positions and preheat oven to 350 degrees Fahrenheit (180 degrees Celsius).
6. Juntar todos los pedacitos que nos han sobrado, hacemos una bola, la enfriamos hasta que este firme, y volvemos a extender. Enharina la superficie con más harina y extiende la masa para hacer más galletas.
6. Gather the scraps together into a ball, chill until firm, and reroll. Dust the surface with more sweet rice flour and roll out the dough to get a couple more wafers.
6. Gather the scraps together into a ball, chill until firm, and reroll. Dust the surface with more sweet rice flour and roll out the dough to get a couple more wafers.
7. Pincha las galletas con un palillo ó tenedor, no hace falta perforar toda la superficie, en dos o más filas.
7. Prick the wafers with toothpick or fork, not all the way through, in two or more rows.
7. Prick the wafers with toothpick or fork, not all the way through, in two or more rows.


8. Hornear durante 25 minutos, hasta que adquiera un color marrón y este ligeramente firme al tacto, rota la bandeja a la mitad para asegurarte que se hagan. Probablemente dure menos, y dependa de donde se coloque la bandeja y de cada horno. Las que se coloquen en la parte baja del horno se pondrán marrón más rápido. [NOTAeva: en mi horno con 20 minutos estaban listas]
8. Bake for 25 minutes, until browned and slightly firm to the touch, rotating sheets halfway through to ensure even baking. Might take less, and the starting location of each sheet may determine its required time. The ones that started on the bottom browned faster.
8. Bake for 25 minutes, until browned and slightly firm to the touch, rotating sheets halfway through to ensure even baking. Might take less, and the starting location of each sheet may determine its required time. The ones that started on the bottom browned faster.


9. Cuando estén completamente frías, coloca las galletas en un procesador y triturarlas hasta hacer 1 1/4 tazas (300 mL) de migas de galletas, [NOTAeva: yo usé un mortero]. Otra forma de hacer esto es coger una bolsa de plástico, meterlas todas dentro y triturarlas con un rodillo de madera hasta que estén hechas migas.
9. When cooled completely, place enough wafers in food processor to make 1 1/4 cups (300 mL) of crumbs. Another way to do this is to place in a large ziplock bag, force all air out and smash with a rolling pin until wafers are crumbs.

BARRAS NANAIMO.
NANIMO BARS.
INGREDIENTES: Capa de abajo.
* 1/2 taza (115 gr.) (4 onzas) Mantequilla sin sal
* 1/4 taza (50 gr.) (1.8 onzas) Azúcar (granulada)
* 5 cucharadas (75 mL) Cacao en polvo sin azúcar
* 1 Huevo grande. Batido
* 1 1/4 tazas (300 mL) (160 gr.) (5.6 onzas) Galletas Graham machadas (Ver receta arriba)
* 1/2 taza (55 gr.) (1.9 onzas) Almendras (Cualquier tipo, finamente picadas)
* 1 taza (130 gr.) (4.5 onzas) Coco (en polvo seco) (triturado, azucarado ó sin azúcar)
INGREDIENTS: Bottom Layer
1/2 cup (115 g) (4 ounces) Unsalted Butter
1/4 cup (50 g) (1.8 ounces) Granulated Sugar
5 tablespoon (75 mL) Unsweetened Cocoa
1 Large Egg. Beaten
1 1/4 cups (300 mL) (160 g) (5.6 ounces) Gluten Free Graham Wafer Crumbs (See previous recipe)
1/2 cup (55 g) (1.9 ounces) Almonds (Any type, Finely chopped)
1 cup (130 g) (4.5 ounces) Coconut (Shredded, sweetened or unsweetened)
INGREDIETNES: Capa del medio
1/2 taza (115 gr.) (4 onzas) Mantequilla sin sal
2 cucharadas y 2 cucharaditas (40 mL) de nata
2 cucharadas (30 mL) Polvos de flan/natillas ó pudding de vainilla (Tal como Bird's ó Flanin el niño ó flan Royal)
2 tazas (254 gr.) (8.9 onzas) Azúcar glass
For Nanaimo Bars - Middle Layer
1/2 cup (115 g) (4 ounces) Unsalted Butter
2 tablespoons and 2 teaspoons (40 mL) Heavy Cream
2 tablespoons (30 mL) Vanilla Custard Powder (Such as Bird's. Vanilla pudding mix may be substituted).
2 cups (254 g) (8.9 ounces) Icing Sugar
INGREDIENTES: Capa de arriba
4 onzas (115 gr.) de chocolate semi-dulce [NOTAeva: use Nestle postre]
2 cucharadas (28 gr.) (1 onza) de Mantequilla sin sal
For Nanaimo Bars - Top Layer
4 ounces (115 g) Semi-sweet chocolate
2 tablespoons (28 g) (1 ounce) Unsalted Butter


ELABORACIÓN:
DIRECTIONS:
1. Para la capa de abajo: Derrite al baño maría la mantequilla, el azúcar y el cacao en polvo. Añade el huevo batido y remueve hasta espesar. Retira del fuego. Viértelo sobre las galletas trituradas, las almendras y el coco seco rallado. Mezclar todo bien. Echa la masa sobre un molde de tamaño 8 por 8 pulgadas (20,32 x 20,32 cm) previamente untado de mantequilla ó forrado con papel albal (ó de hornear, lo que tengaís más a mano), presiona bien con ayuda de las manos.
1. For bottom Layer: Melt unsalted butter, sugar and cocoa in top of a double boiler. Add egg and stir to cook and thicken. Remove from heat. Stir in crumbs, nuts and coconut. Press firmly into an ungreased 8 by 8 inch (20,32 x 20,32 cm) pan.
1. For bottom Layer: Melt unsalted butter, sugar and cocoa in top of a double boiler. Add egg and stir to cook and thicken. Remove from heat. Stir in crumbs, nuts and coconut. Press firmly into an ungreased 8 by 8 inch (20,32 x 20,32 cm) pan.


2. Para la capa del medio: Batir muy bien la mantequilla, la nata, los polvos de flan/natillas (ó puding de vainilla) y el azúcar glass. Bate hasta que adquiera un ligero color. Extender sobre la capa de abajo que hemos puesto en el molde previamente.
2. For Middle Layer: Cream butter, cream, custard powder, and icing sugar together well. Beat until light in colour. Spread over bottom layer.


3. La capa de arriba: Derretir el chocolate y la mantequilla abaja temperatura (NOTAeva: lo hice en el microondas). Enfriar. Una ves frío, verter sobre la capa del medío y dejar enfriar.
3. For Top Layer: Melt chocolate and unsalted butter over low heat. Cool. Once cool, pour over middle layer and chill
3. For Top Layer: Melt chocolate and unsalted butter over low heat. Cool. Once cool, pour over middle layer and chill


---------------------------
INFORMACIÓN ADICIONAL:
ADDITIONAL INFORMATION:
Las Barras tienen que estar muy muy frías, no te preocupes si tienes que meterlas en el congelador.
These bars freeze very well, so don't be afraid to pop some into the freezer.
These bars freeze very well, so don't be afraid to pop some into the freezer.
Las galletas graham pueden conservarse en un taper hermético durante 2 semanas.
The graham wafers may be kept in an airtight container for up to 2 weeks. Mine lasted about that long.
The graham wafers may be kept in an airtight container for up to 2 weeks. Mine lasted about that long.
Sí haces las galletas graham con harina de trigo, sustituye las harinas libre de gluten (la tapioca, la harina de arroz, y la harina de sorgo) por 2 1/2 tazas más 2 cucharadas de harina de trigo. Controla bien las galletas dentro del horno, ya que se hornean más rápido que las masa libre de gluten, algunas veces en 12 minutos [NOTAeva: en mi horno a 180ºC las tuve 20 minutos].
If making the graham crackers with wheat, replace the gluten-free flours (tapioca starch, sweet rice flour, and sorghum flour) with 2 1/2 cups plus 2 tablespoon of all-purpose wheat flour, or wheat pastry flour. Watch the wheat-based graham wafers very closely in the oven, as they bake faster than the gluten-free ones, sometimes only 12 minutes.
If making the graham crackers with wheat, replace the gluten-free flours (tapioca starch, sweet rice flour, and sorghum flour) with 2 1/2 cups plus 2 tablespoon of all-purpose wheat flour, or wheat pastry flour. Watch the wheat-based graham wafers very closely in the oven, as they bake faster than the gluten-free ones, sometimes only 12 minutes.
Para las Barras Nanaimo, si las haces con harina de trigo, sustituye las migas de galletas graham libre de gluten por las migas de galletas graham con harina de trigo!
For the Nanaimo Bars, if making with wheat, replace the gluten-free graham crumbs with equal parts wheat graham wafer crumbs!
For the Nanaimo Bars, if making with wheat, replace the gluten-free graham crumbs with equal parts wheat graham wafer crumbs!
---------------------------
Information on Celiac disease: Celiac disease
Information on Vancouver 2010: Vancouver 2010
City of Nanaimo: City of Nanaimo
Gluten Free Flour Information: Gluten Free Mommy
Video on making Nanaimo bars: How to make Nanaimo Bars
Recipe and video for Vegan Nanaimo Bars (you didn’t think I’d leave you guys out?): Everyday Dish TV: Sarah Kramer's nanaimo
Recipe for gluten-free and vegan Graham Wafers: The sensitive pandry: Graham plain & fancy


.JPG)